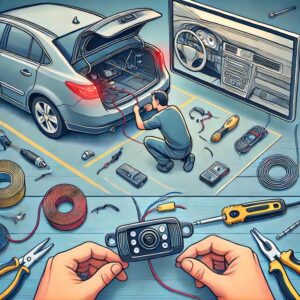
How to Install a Car Backup Camera Yourself: A DIY Guide for Safer Driving
A car backup camera is no longer a luxury—it’s a vital safety tool. If your vehicle lacks one, installing a backup camera yourself is a cost-effective solution. This guide will walk you through the process, helping you improve your driving safety while adding value to your car.

Why Install a Backup Camera?
Backup cameras enhance visibility, especially in blind spots, reducing the risk of accidents while reversing. They’re particularly useful for larger vehicles like SUVs, trucks, and vans. Installing one yourself not only saves money but also allows you to customize it to your preferences.
Types of Backup Cameras
Before you start, choose the type of camera that fits your needs:
- Wired Cameras: Reliable and provide a steady connection but require more installation effort.
- Wireless Cameras: Easier to install but may experience occasional signal interference.
- License Plate Cameras: Compact and easy to mount on your license plate.
- Integrated Systems: Ideal if you’re upgrading your car’s head unit for a more seamless look.
Step-by-Step Installation Guide
Step 1: Gather Your Tools and Materials
You’ll need:
- Backup camera kit
- Screwdrivers
- Drill (if needed)
- Wire strippers and crimpers
- Electrical tape or heat shrink tubing
- Multimeter (for checking electrical connections)
Step 2: Choose the Camera Location
The most common placement is above the license plate or in the rear bumper. Ensure the camera has a clear and unobstructed view of the rear.
Step 3: Mount the Camera
Secure the camera using screws or adhesive. For license plate-mounted cameras, you can attach it directly to the license plate frame. If drilling is required, ensure precision to avoid damaging your car’s body.
Step 4: Route the Wires
- For wired systems, run the camera’s power and video cables through your car’s trunk or undercarriage. Use zip ties to secure them and prevent tangling.
- Wireless cameras typically require less cable management but still need a power connection.
Step 5: Connect Power to the Camera
Backup cameras usually draw power from the reverse light circuit. Find the reverse light wires. Strip a small section of them. Connect the camera’s power wires with connectors or electrical tape.
Step 6: Install and Connect the Monitor
Your monitor can connect in different ways. It might attach to the dashboard. It could also replace the rearview mirror. Alternatively, it may work with a display you already have. Connect the video feed from the camera to the monitor, ensuring compatibility.
Step 7: Test the System
Turn on your vehicle and shift into reverse. The camera feed should appear on the monitor. Adjust the camera’s angle for a clear view, ensuring it captures the maximum field of vision.
Common Installation Mistakes to Avoid
- Incorrect Wiring: Misconnecting the power wires can cause the system to malfunction. Always double-check connections.
- Poor Camera Placement: Mounting the camera at the wrong angle may result in limited visibility.
- Exposed Wires: Use protective tubing or tape to shield wires from moisture and wear.
When to Seek Professional Help
If you’re uncomfortable working with car electronics or lack the necessary tools, consult a professional installer. While DIY installation is cost-effective, a professional ensures a seamless setup.
Final Thoughts
Installing a car backup camera yourself is a practical way to improve your vehicle’s safety and functionality. With the right tools, a good camera kit, and this guide, you can complete the project in a single afternoon. Take the plunge and enjoy safer, more confident driving today!


